Introducing Canva: Everything You Need in an Image Editor for Free

What is Canva?

Canva is an easy-to-use freemium image editor that can be accessed in any modern browser, without downloading software. One of the best parts about Canva is how many features are available on the free plan, including working with a team. Pro plans offer branding, access to additional templates and stock media, more cloud storage, and a few advanced editing options. The Pro plan is currently $120 per year, which may be worth it if you want a robust feature set to generate images for a small business or club. Take a look at the Canva pricing page to find out more about the features available at different subscription levels. Hot tip: Canva offers free Pro subscriptions for educational and nonprofit institutions.

Why would I need Canva?

Whether you post regularly to social media or just want to create a pretty newsletter for your family once a year, almost everyone can find a reason to use Canva. The intuitive interface makes it easy to create memes, promotional graphics, infographics, presentation slides, invitations, flyers, signs, brochures, videos – you name it! There are plenty of ready-to-use templates, but you can also start creating something from scratch. If you already have an image you want to incorporate into a larger design, you can do that, too!

Canva is especially helpful if you’re not a graphic designer. The built-in templates are perfectly sized for any medium and can be used as-is or provide inspiration for your own design. Drag-and-drop images, fonts, borders, backgrounds, and other elements to create your perfect design. Then download the image in the format of your choice.

Where can I learn more?

Tech-Talk, a resource provided by the East Greenbush Community Library to its members, has created several resources for learning the ins and outs of Canva. Here are a few examples:

Have you used Canva?

If you’ve tried Canva, let us know what you think about it! Do you have an image tool that you love? We’d love to hear about it! Let us know in the comments.

Introducing Biteable: The Best Free Image Resizer

If you post to a blog or social media, it is likely you need the same image in several different sizes to maintain a consistent branding experience across platforms. Manually resizing an image can be a frustrating and time-consuming experience, especially when social media networks keep changing their optimum sizing requirements.

If you are a Canva user, you may have already seen automatic resizing in action. When it was first introduced, Canva’s tool was a breakthrough. Our library relied on it for messaging across platforms. Canva requires an account and login, though. If you are looking for a free tool you can use without creating an account, Biteable’s tool may be for you. It also contains a feature that goes one step beyond Canva’s resizer.

What Is Biteable?

Biteable is a freemium suite of tools for creating and editing videos. The free tier includes puts a Biteable watermark on your videos (but not in the image resizer) and limits the resolution of your video. It does include access to stock clips and images, as well as allowing unlimited exports. For more information about features in the paid plans, visit Biteable’s pricing page.

You will need an account to create and edit videos, even at the free level. But their offer their image resizing tool with no account needed and no strings attached.

The Image Resizer

Upload Your Image

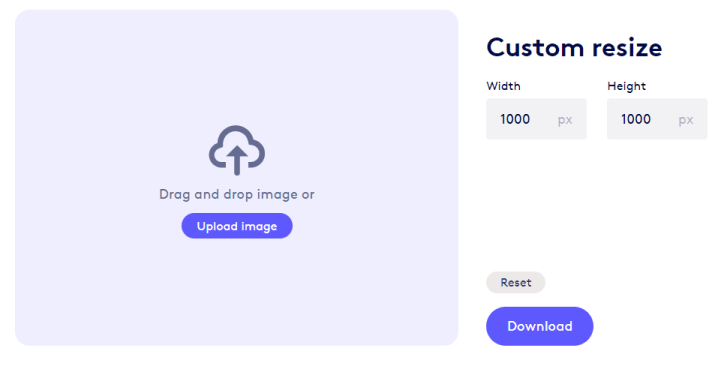
To access the tool, open a browser and point it to: https://biteable.com/tools/image-resizer. Look for the “custom resize” box and upload your starter image:

Screen shot of the image upload window in the custom resize area.
Start by uploading your image here

Don’t worry about setting the width and height here unless you have a specific size in mind. The magic starts when we scroll down a bit to set our focal point. This is the extra feature that sets it apart from Canva’s tool, in my opinion.

Set the Focus Point

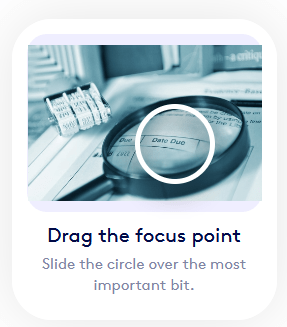
Drag the white circle around the most important part of your image. Canva assumes the most important part is centered, but that is not always the case. In this image, the most important thing is a bit off to the right:

Screen shot showing the original image with a white circle over the intended focal point of the image.

Scan the Results

After setting the focus point, scroll down. First you will see all 10 different sizes Facebook requires for their image areas:

Screen shot of the original image converted to all 10 standard sizes Facebook requires for stories, page covers, event covers, ads, etc.

Keep scrolling and you will see standard sizes for:

  • Instagram (6)
  • Twitter (6)
  • YouTube (4)
  • Pinterest (5)
  • LinkedIn (9)
  • Google Display (8)
  • Email/Blog (3)

Handily, the focal point selector sticks with you as you scroll down the page, so you can adjust on the fly, if needed.

Download Some or All Images

In the focus point selector, there is a button that allows you to download all of the images for all platforms at once. These will arrive as a compressed file on your computer.

Images can also be downloaded individually by clicking on the download icon in upper right of each image:

Screen shot showing the download icon in the upper-right of the resized image.
Download icon in the upper-right

Conclusion

Have you used Biteable’s image resizer? Do you have an image resizing tool you love? Let us know in the comments.

Coming Soon: Automatic Renewals

As a service for our patrons, we’re changing the way we handle renewals. Starting February 1st, eligible items that have reached their due date will be renewed automatically. This means you won’t have to lift a finger to have your loan period extended!

There are some exceptions, including materials that have already been renewed twice, those that another patron has requested, and high-demand, non-renewable items like museum passes.

When you receive your due-date reminder, it will show the items that have been automatically renewed along with the new due date. You will also see which items cannot be renewed and must be returned to the library.

Got questions? We have put an FAQ page on our website. If you don’t see the answer to your question in the FAQ, you can post your question below or contact us at the library.

Tired of Chrome Slowing You Down? Try This Extension!

If you use Google Chrome, you may have noticed that the browser can be very sluggish at times. If you open multiple tabs, the problem gets even worse. Maybe you’ve tried closing tabs, restarting the browser, uninstalling extensions, or scanning for malware, but performance doesn’t improve. On portable devices, this can even drain your battery. This was true in my use of Chrome and it really started to frustrate me, so I went searching for answers.

Why is it like this?

Chrome has never been good at handling system resources, even if the user isn’t trying to do too much at once. That is, it takes more of your device’s computing power and memory to run than other browsers. This issue is compounded when multiple tabs are opened, as each tab needs places more demands on the device.

It makes sense that closing those extra tabs would then free up those resources, right? Unfortunately not. Even though you close the tabs, Chrome keeps them active in memory for easy recovery, so they’re never really closed.

What can be done?

Of course, you could always change to a different internet browser, but let’s assume you want to stay with Chrome. There are lots of extensions out there that claim to solve this slowness issue, and I have tried several with varying degrees of success. The one that worked best for me was Auto Tab Discard.

Auto Tab Discard suspends inactive or idle tabs, freeing up the resources needed to run them. You can choose to manually discard tabs or configure a time period for tabs to auto-discard. The default idle time is 10 minutes. If you don’t want a site to ever auto-discard, you can whitelist it for the session or for all time. The discard works like a pause. Your scrolling progress and any form text you entered are saved, but no Javascript (ads and widgets) or other draining activity continues.

Getting started

Once the extension is installed (visit the extension page while using Chrome) it starts working immediately. While this extension works just fine with its default configuration, if you’re a power user you may want to visit the additional settings mentioned at the end of this article.

To open Auto Tab Discard, click on the puzzle icon in the upper right corner of the browser. Then left-click Auto Tab Discard from the sub-menu. Pro tip: You may want to click the pin icon first to keep Auto Tab Discard visible in the toolbar, otherwise you will need to click the puzzle icon every time you want to access it.

Extension list

The basic menu that comes up allows you to choose to manually discard or keep tabs, or see more options:

Left-click menu

At first I was confused because the Keep Tabs for This Site area was grayed out for me. Then I right-clicked on the Auto Tab Discard icon and discovered a different menu that allowed me to keep the tab for this session. After I did that, the Keep Tabs for This Site “always” option was available in the left-click menu.

The right-click menu

You can tell a tab is paused by the icon next to the website’s favicon (underlined in red):

A paused tab with the indicator underlined

To activate the page again, simply click on the tab.

So many options

The options button at the bottom of the left-click Auto Tab Discard menu leads to a page with many, MANY options. You can customize just about everything (this is just the top of the list):

Full options screen

Give it a try!

Now that you know about the Auto Tab Discard extension, try it out today to see if your Chrome browser speeds up. Let us know how it went in the comments!

Have Your Passwords Been Compromised?

These days, security breaches are in the news so often you may think there is no way to avoid having your information stolen. While no credentials are fully safe from hacking, using good password hygiene (not reusing passwords, using complex passwords, etc.) and staying on top of which of your accounts has been hacked can go a long way in keeping you safe.

Even if you watch or read news 24/7, it is impossible to keep up with all of the account breaches yourself. Luckily, https://haveibeenpwned.com/ exists to keep track of this for you.

The process is simple and free. Point your internet browser to https://haveibeenpwned.com/ and enter your email address.

When I put my personal email in, I got this message:

If I scroll down a bit, I can see the individual instances in which my information was compromised, along with more information about each particular hack:

What Do I Do with This Information?

Just because you have an account with a service that was breached doesn’t mean someone is actively using your account. It just means your information may be in the wrong hands. Knowing which accounts have been compromised can help you in the following ways:

  • Quickly change passwords and/or associated email addresses to prevent someone taking over your account. Also change credentials for any other account that uses the same email/password combination.
  • Get a heads up to check and make sure no unauthorized activity has happened on your compromised account.
  • Evaluate whether this is a service/account you really need. If not, delete your account, if possible.
  • Discover services you forgot you had signed up for!

Try It Out

Now it’s your turn to see if any of your email addresses have been pwned. If they have, there is no need to panic. Just follow the steps above to re-secure your accounts.