Tired of Chrome Slowing You Down? Try This Extension!

If you use Google Chrome, you may have noticed that the browser can be very sluggish at times. If you open multiple tabs, the problem gets even worse. Maybe you’ve tried closing tabs, restarting the browser, uninstalling extensions, or scanning for malware, but performance doesn’t improve. On portable devices, this can even drain your battery. This was true in my use of Chrome and it really started to frustrate me, so I went searching for answers.

Why is it like this?

Chrome has never been good at handling system resources, even if the user isn’t trying to do too much at once. That is, it takes more of your device’s computing power and memory to run than other browsers. This issue is compounded when multiple tabs are opened, as each tab needs places more demands on the device.

It makes sense that closing those extra tabs would then free up those resources, right? Unfortunately not. Even though you close the tabs, Chrome keeps them active in memory for easy recovery, so they’re never really closed.

What can be done?

Of course, you could always change to a different internet browser, but let’s assume you want to stay with Chrome. There are lots of extensions out there that claim to solve this slowness issue, and I have tried several with varying degrees of success. The one that worked best for me was Auto Tab Discard.

Auto Tab Discard suspends inactive or idle tabs, freeing up the resources needed to run them. You can choose to manually discard tabs or configure a time period for tabs to auto-discard. The default idle time is 10 minutes. If you don’t want a site to ever auto-discard, you can whitelist it for the session or for all time. The discard works like a pause. Your scrolling progress and any form text you entered are saved, but no Javascript (ads and widgets) or other draining activity continues.

Getting started

Once the extension is installed (visit the extension page while using Chrome) it starts working immediately. While this extension works just fine with its default configuration, if you’re a power user you may want to visit the additional settings mentioned at the end of this article.

To open Auto Tab Discard, click on the puzzle icon in the upper right corner of the browser. Then left-click Auto Tab Discard from the sub-menu. Pro tip: You may want to click the pin icon first to keep Auto Tab Discard visible in the toolbar, otherwise you will need to click the puzzle icon every time you want to access it.

Extension list

The basic menu that comes up allows you to choose to manually discard or keep tabs, or see more options:

Left-click menu

At first I was confused because the Keep Tabs for This Site area was grayed out for me. Then I right-clicked on the Auto Tab Discard icon and discovered a different menu that allowed me to keep the tab for this session. After I did that, the Keep Tabs for This Site “always” option was available in the left-click menu.

The right-click menu

You can tell a tab is paused by the icon next to the website’s favicon (underlined in red):

A paused tab with the indicator underlined

To activate the page again, simply click on the tab.

So many options

The options button at the bottom of the left-click Auto Tab Discard menu leads to a page with many, MANY options. You can customize just about everything (this is just the top of the list):

Full options screen

Give it a try!

Now that you know about the Auto Tab Discard extension, try it out today to see if your Chrome browser speeds up. Let us know how it went in the comments!

Have Your Passwords Been Compromised?

These days, security breaches are in the news so often you may think there is no way to avoid having your information stolen. While no credentials are fully safe from hacking, using good password hygiene (not reusing passwords, using complex passwords, etc.) and staying on top of which of your accounts has been hacked can go a long way in keeping you safe.

Even if you watch or read news 24/7, it is impossible to keep up with all of the account breaches yourself. Luckily, https://haveibeenpwned.com/ exists to keep track of this for you.

The process is simple and free. Point your internet browser to https://haveibeenpwned.com/ and enter your email address.

When I put my personal email in, I got this message:

If I scroll down a bit, I can see the individual instances in which my information was compromised, along with more information about each particular hack:

What Do I Do with This Information?

Just because you have an account with a service that was breached doesn’t mean someone is actively using your account. It just means your information may be in the wrong hands. Knowing which accounts have been compromised can help you in the following ways:

  • Quickly change passwords and/or associated email addresses to prevent someone taking over your account. Also change credentials for any other account that uses the same email/password combination.
  • Get a heads up to check and make sure no unauthorized activity has happened on your compromised account.
  • Evaluate whether this is a service/account you really need. If not, delete your account, if possible.
  • Discover services you forgot you had signed up for!

Try It Out

Now it’s your turn to see if any of your email addresses have been pwned. If they have, there is no need to panic. Just follow the steps above to re-secure your accounts.

Scheduling Email Reminders Just Got Easier

If you’re like me, you often receive emails at a time when you aren’t able to deal with them immediately. To manage them I have tried: marking messages as unread, copying email text to a calendar item, and flagging them as Outlook tasks with reminders. For various reasons, none of these workflows were optimal for me. Then I discovered FollowUpThen.

FollowUpThen is a service that allows you to set timed reminders for following up on emails and tasks with fewer steps and a cleaner inbox. There is a free tier with limited options, and that was enough for me. If you’d like to get fancy with calendar integration, SMS integration, attachments or managing FollowUpThen for a team, there are two additional paid tiers.

How Does It Work?

FollowUpThen has lots of different functions. At its core, it uses a series of email addresses you can use to forward emails to be reminded to take action at a particular time. Here are some examples:

  • Snooze an email for three weeks by forwarding it to 3weeks@followupthen.com. The email will reappear in your inbox in exactly three weeks.
  • Send or forward an email to tomorrow4pm@followupthen.com to remind yourself to do something tomorrow at 4pm.
  • Send or forward an email to everyweekday@followupthen.com to get a daily reminder. (limited in free plan)
  • Task (limited number in free plan): send or forward an email to 5pm-t@followupthen.com you will assign a task to yourself that is due tomorrow at 5. If you have not completed the task by the due date, you will be reminded every day until it has been completed or cancelled.

You can set a time interval (x minutes, hours, weeks, months, years), a specific time of day (ex. 11pm), a specific date, a specific date/time, day of week, unique day of month (ex. 3rdThursday), relative timing (ex. tonight, tomorrow) and more.

Recurring reminders (ex. daily, weekly, or custom intervals) mentioned above available, using a different email name syntax. Visit this page to learn more about how to structure email addresses for these different functions. Keep in mind that recurring reminders are limited on the free plan.

Features

FollowUpThen has many features to help you customize your reminders. Here are some highlights:

  • To, CC, BCC
    • TO: Only you receive the followup.
    • BCC: Only you receive the followup. (No recipients can see that you are using an email reminder service. Followup includes the original email for reference).
    • CC: Everyone in the ‘to’ field (up to 15) receives a followup in addition to yourself.
  • Autocomplete: send an email to autocomplete@followupthen.com to receive a list of the most popular timing/email formats.
  • Short domain: to save keystrokes, instead of time@followupthen.com, use time@fut.io. Same email, less typing.
  • v-card: download the FollowUpThen vCard to add the addresses to address book for ease of use.

View, Edit, or Cancel Follow-ups

Your account will include a My Follow-ups page that you can use to view and edit your follow-ups. Alternatively, you can email pending@followupthen.com to receive a list of current follow-ups.

There are two ways to cancel follow-ups. If you are setting a new reminder on an existing thread with a existing reminder, you can use syntax in the new reminder address to cancel previous reminders. Or, forward a message in a thread with an existing reminder to cancel@followupthen.com to cancel all reminders on a thread.

Paid Features

The paid tiers include additional options not included in this post. To find out more, click the link on a feature:

Unsupported Platforms

Unfortunately, not all email platforms can support “email-based actions.” For example, the “Gmail” app on iOS, Mailbox for iOS and some versions of the native Android mail client do not yet allow these actions. If you rely on one of these platforms it might be best to leave this option disabled.

If you use multiple email clients – where one supports email-based actions and one does not, you can leave them turned on and then simply use the “other” postpone option if you need to act on a followup from your unsupported email client.

Summary

If you are looking for a way to streamline the process of “snoozing” emails and tasks, FollowUpThen provides a functional product on the free tier, while keeping premium tiers affordable for those who are looking for extra features. Have you used FollowUpThen? What did you think? Let us know in the comments!

Find and Unsubscribe from Unwanted Emails Instantly

Are you tired of seeing the same emails in your inbox over and over, but never get around to clicking “unsubscribe?” Or, would you prefer it if all of your subscription emails came in a single daily digest email? Enter unroll.me, a free service that will scan your inbox for subscription emails and provide a list for you to evaluate and manage. This service is available through both a browser and an app.

While the service is free, you will need to create an account. If you use Google for email and use your Google credentials to create the account, you can allow it access to your inbox in a single step. Unroll.me currently supports email accounts from Outlook.com (including Hotmail, MSN, & Windows Live), Gmail, Google Apps, Yahoo! Mail, AOL Mail, and iCloud. Be sure to make sure you are comfortable with unroll.me’s privacy policy before giving access.

Edit Subscriptions

To see the list of your current subscriptions, click on “Edit Subscriptions” in the top menu:

For each email subscription listed, you will have three options: add to rollup (single digest email), keep in inbox (leave alone), or unsubscribe.

List example with options

You may notice a company’s name appears more than once in your list. This is because some companies maintain separate lists based on interests. Be sure you are unsubscribing to the one you no longer want to receive.

Keep in mind that some things may appear as subscriptions that are actually notifications you may need, like appointment reminders.

Click “unsubscribe” and the line with that account disappears, indicating you are unsubscribed. No need to go to secondary pages to explain why you unsubscribed or be pressured into re-subscribing.

Add to Rollup

The rollup is a digest that gives you an overview of all the subscriptions you receive each day. The rollup will keep your inbox clean by organizing the subscriptions you select into a single daily digest email. You can choose whether to receive your rollup in the morning, afternoon, or evening.

If you decide to remove a subscription from your rollup, you can do so from the “Your Rollup” section of the top menu.

You will still be subscribed to the email, but it will appear outside your rollup.

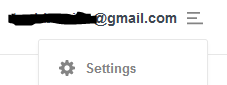
If you decide you no longer want to receive a rollup at all, you can deactivate it in your account settings (three-bar icon next to your email address):

You will still be subscribed to the emails, but they will not appear in digest format.

Have More Questions?

Unroll.me has created a helpful FAQ page, or you can visit their support portal.

Have you used this tool yourself? Let us know in the comments.

Using Canva for Video

Our last post highlighted Snagit as an image and video editing tool, so we thought we’d highlight another popular graphic editing tool – Canva. You may have used Canva as an image editing tool, but did you know it can also edit videos?

If you aren’t familiar with Canva, you may want to start with this introductory webinar and article to get an overview.

The Canva: Getting Started webinar goes into more detail about Canva basics and starting a design from scratch.

The next video/article in the series, Canva: Graphic Design, focuses on more advanced concepts to make eye-catching designs and collaborate with teams.

When you are comfortable creating and editing still images, you can dive into the new video-creation features Canva has to offer intermediate users. Tech-Talk created two webinars about creating video in Canva:

Have you tried making videos in Canva? Let us know what you think in the comments below.