Today we are highlighting Avatarify, a face animator app backed by artificial intelligence that is able to take an image and a song and make the person (or animal!) in the image sing that song. Then you can share the video with friends. The app is free and available from the Google Play Store or the Apple App Store. Keep in mind that while this is called a “deep fake” video, you aren’t likely to fool anyone with the resulting video.
Using the App
After installing the app on your device, the initial screen makes it appear that a subscription is required to use the app. Note that it is easily dismissed by tapping the x in the corner of the screen.
Pick a song from the Avatarify library.
Next, tap “add photo” to select an image from your gallery.
The first time, you’ll be prompted to enable access to your gallery. This is required unless you want to use a demo image. For the first round, I chose a picture of my kittens. No matter how hard I tried, I couldn’t make the mouth land in the right place, giving the cat a monstrous look in the video. I gave up and tried a demo image of Elon Musk.
If you’re using your own image, it might detect the face(s) automatically. If not, the next screen shows a shadow face over the image (the part I had trouble with in the cat picture). Move it over a face and save. You can select multiple faces in the image to animate.
When I didn’t have to aim the “shadow face” over the image, it was really easy! This is how mine turned out:
The quality of the initial video was higher, but I compressed the file to lighten the file load on this page.
After the video is created, you have the option to save it to your device or share it using any method available on your phone.
Would You Use It?
This was a fun little tool, and the demos on their webpage suggest a variety of use cases: https://avatarify.ai/. Is this a tool you would use to share videos with your friends? Let us know in the comments.
If you struggle with writing content for your blog, social media, website, ads, emails, or other online platforms, Rytr may be able to help. Rytr is an AI that can help you save time, improve SEO rankings, boost ad/call-to-action conversions, and overcome writer’s block. Here are a few of the other use cases they list on their website:
Come up with catchy names for your brand or business
Write a business idea pitch
Prepare interview questions
Create job or product descriptions
Generate post/video ideas
Craft replies to reviews and messages
Write song lyrics
Story plots
Reviews
Headlines/taglines
As a bonus, Rytr checks for plagiarism automatically. Pretty much, if you need to write, Rytr can help.
You will need to create an account to use this service. There is a free version that allows you to generate 5000 characters per month. Depending on how you use the service, that may be enough for you. The paid tiers offer more characters per month, the ability to create custom use cases, and more support.
Getting Started
Upon logging in, you are presented with a writing window. Options on the left allow you to select the language, tone, and use case (purpose of the writing). The center is empty for a new account, but will eventually contain a list of your creations. You can use the menu on the upper left to mark favorites, create a new folder, or create a new document. For this example, I have chosen to write an informative email in English.
After choosing your option, enter the key points of your email. This is what I entered:
We have a new service.
Read the Times Union online
https://bit.ly/EGTimesUnion
Must be a resident cardholder.
I left the settings at 2 variants (creates two options) and optimal creativity level.
This was the result:
It came up with two decent options, aside from the fact that it picked up a link for a coupon that has nothing to do with this and put it in the first option. The second variant was definitely more like the tone we use in our library emails. All of the text in this window, including the suggested subject, are editable and can be formatted.
Fine Tuning the Result
When I click on a phrase, additional editing options pop up. Select a large chunk of text and click “more” to access the plagiarism checker.
After some manual edits, I dropped in an image. If you do this, be sure to use an image of high quality, because it will be stretched to fit the page width. I couldn’t find a way to format it to stay in its original size or form a column in the email. Images may be more easily handled by adding them later in your email editor. Here is the finished product:
By default, all creations are saved and listed on your account home page. To reveal additional options for the project, click the three-dot menu icon in the upper right of the page.
Returning to the account home page, we see my document and a folder created for it. To move a file into a folder, click the three-dot menu for the document and select move. Select the folder from the popup and click “move here.”
If you decide you want to go back to the original variants that were created, click on history in the upper left of the screen and select an item.
The original information is all there, along with the number of credits used and the date and time of creation. If you’re really pleased with the outcome, click the orange button to “Ryte more like this.” If you are unhappy with the outcome, click “report poor output quality.”
If you need help, click the question mark icon in the upper right of the screen. Links to tutorials, resources, community, chat, and email are available.
Final Thoughts
Sometimes writing even the simplest copy can take more time than you have. Rytr can help ease the burden and free up your time for other things.
You may have noticed after getting a new Windows computer or updating your operating system to the latest version that Microsoft Teams opens automatically every time someone on the computer logs in, even if none of the computer’s users use the software. If you’re not having this issue with Teams, you may be having it with another app you have installed. Personally, I find this really annoying. I prefer to open apps manually as needed.
Thankfully, this behavior is easily disabled. If you’d like to learn how to stop apps from loading when you log in, check out this article and video by Tech-Talk. Tech-Talk is a subscription resource brought to you by the library.
If you post images on the internet with some regularity, you may have noticed that every platform has different recommended sizes for images. It can be a pain to make a graphic over several times to post in multiple places. In a previous post, I wrote about Biteable, a tool that will automatically convert any image to all of the recommended sizes for social media platforms. This is great for my social media needs, but not for another resizing issue that comes up regularly for me.
Our website has a row of featured events/services/announcements that need to be sized at 300px x 300px in order to line up or stack neatly on any size screen. I have been given graphics and logos in all dimensions that I have needed to make fit into these blocks. Canva has a magic resize tool, but that hasn’t generated results that work for me.
Enter Pixlr
Pixlr comes in two “flavors.” Pixlr X and Pixlr E. Both are free, browser-based tools that don’t require an account. They are similar to Canva, but not as full-featured. Pixlr X is meant for creating basic designs, while Pixlr E is for editing photos. The free version of Pixlr X is what we are using today, but both products have robust premium versions if you are interested in AI assistance, a larger decorative element library, more support, or no ads.
How I Use It
I am fortunate enough to have several design editing tools at my disposal, and I use different tools for different tasks. Pixlr X fills a very specific need for me, and it never fails.
As I mentioned, the library website needs images that are 300px x 300px. Product logos/graphics, ready-made templates in image editors, and graphics for initiatives from outside our organization (Summer Reading, Tech-Talk, etc.) rarely come in that size, or even in a square shape. For instance, here is the logo for Consumer Reports, a digital resource we provide to our patrons:
The original is 1600px x 900px, so it needed some editing. I opened Pixlr X, then clicked “open image” in the center of the page.
This opened a window that allowed me to select the original Consumer Reports image that is 1600px x 900px. The first thing I wanted to do is scale this down to a 300px width, so I clicked on the layout button in the left menu.
I selected “resize page (scale)” and reset the width to 300. By leaving the “constrain proportions” toggle activated, the height automatically adjusted to prevent the logo from being distoryed.
The next step is to add a 300px x 300px background and center the image. Staying in the layout menu, I selected “set page size.” Here I changed the height to 300, made sure the “relative change” toggle was deactivated and anchored the logo in the center of the image.
This is how it turned out. The checkerboard part indicates transparent space. The next step is to add a background. I could just add white, but then the image would be really boring.
Instead, I want to copy the green from the logo and make that the background. I did this using a separate eyedropper tool to get the hex code number for the color (covered in this article) and then going back to my layout menu in Pixlr to activate the background toggle. This suggests a few colors, but you can click any color to reveal a box to enter a custom color.
I entered the hex code for your desired color in the box and hit “enter” to apply.
This is the finished product. It’s a simple fix that preserves the company’s logo guidelines while making the image suitable for our website.
Pixlr offers different formats and quality options for downloading your new image.
Summary
Pixlr is a free tool that makes design and image editing easy. While many of its features are duplicated in other free or low-cost image editing tools, the ability to change the size of the image canvas without messing up the aspect ratio of the original image in addition to changing the image itself has permanently secured its place in my image editing toolbox. What are your favorite design editing tools? Let us know in the comments.
Have you ever needed to scan and email a document but didn’t have access to a scanner? You’re in luck! You can scan (and electronically sign!) documents using the built in Notes app on your iPhone or iPad.
Scanning Documents
To begin, open up the Notes app on your iOS device. From there, choose an existing note or create a new one by tapping the new icon.
Next, tap the camera icon on the top navigation bar.
Choose Scan Documents from the menu.
The camera will open and you will see the option for Auto or Manual. Auto attempts to find blocks of text to scan, and manual will let you choose the area manually. Once you have your document in the frame, you can tap the white button or the volume down button on the side of your device to take a picture.
After the document image has been captured, you can select the area you would like in your PDF by tapping and dragging the white circles on the corners of the scan. When you have selected the area you would like in your document, you can tap Keep Scan. If you are unhappy with the capture, tap on Retake.
If you only have a one-page document, tap save. If you have a multipage document, continue to capture images, and when you are finished, tap on Save. You will see the images you have already scanned in the bottom center of the screen.
Once you tap save, you will see your saved document in the note. To share the document to email, text, files, or other platforms, open the document by tapping on the picture of it. The default name will be Scanned Documents, unless the scan detects clearly written text in the header of the document. The document will be in PDF format, which is easily accessible to different operating systems.
Once you have tapped on the document to open it, tap on the share icon and choose how you would like to share it. If you would like to rename the document prior to sharing it, tap on its name in yellow in the top center and enter the new name.
Signing Documents
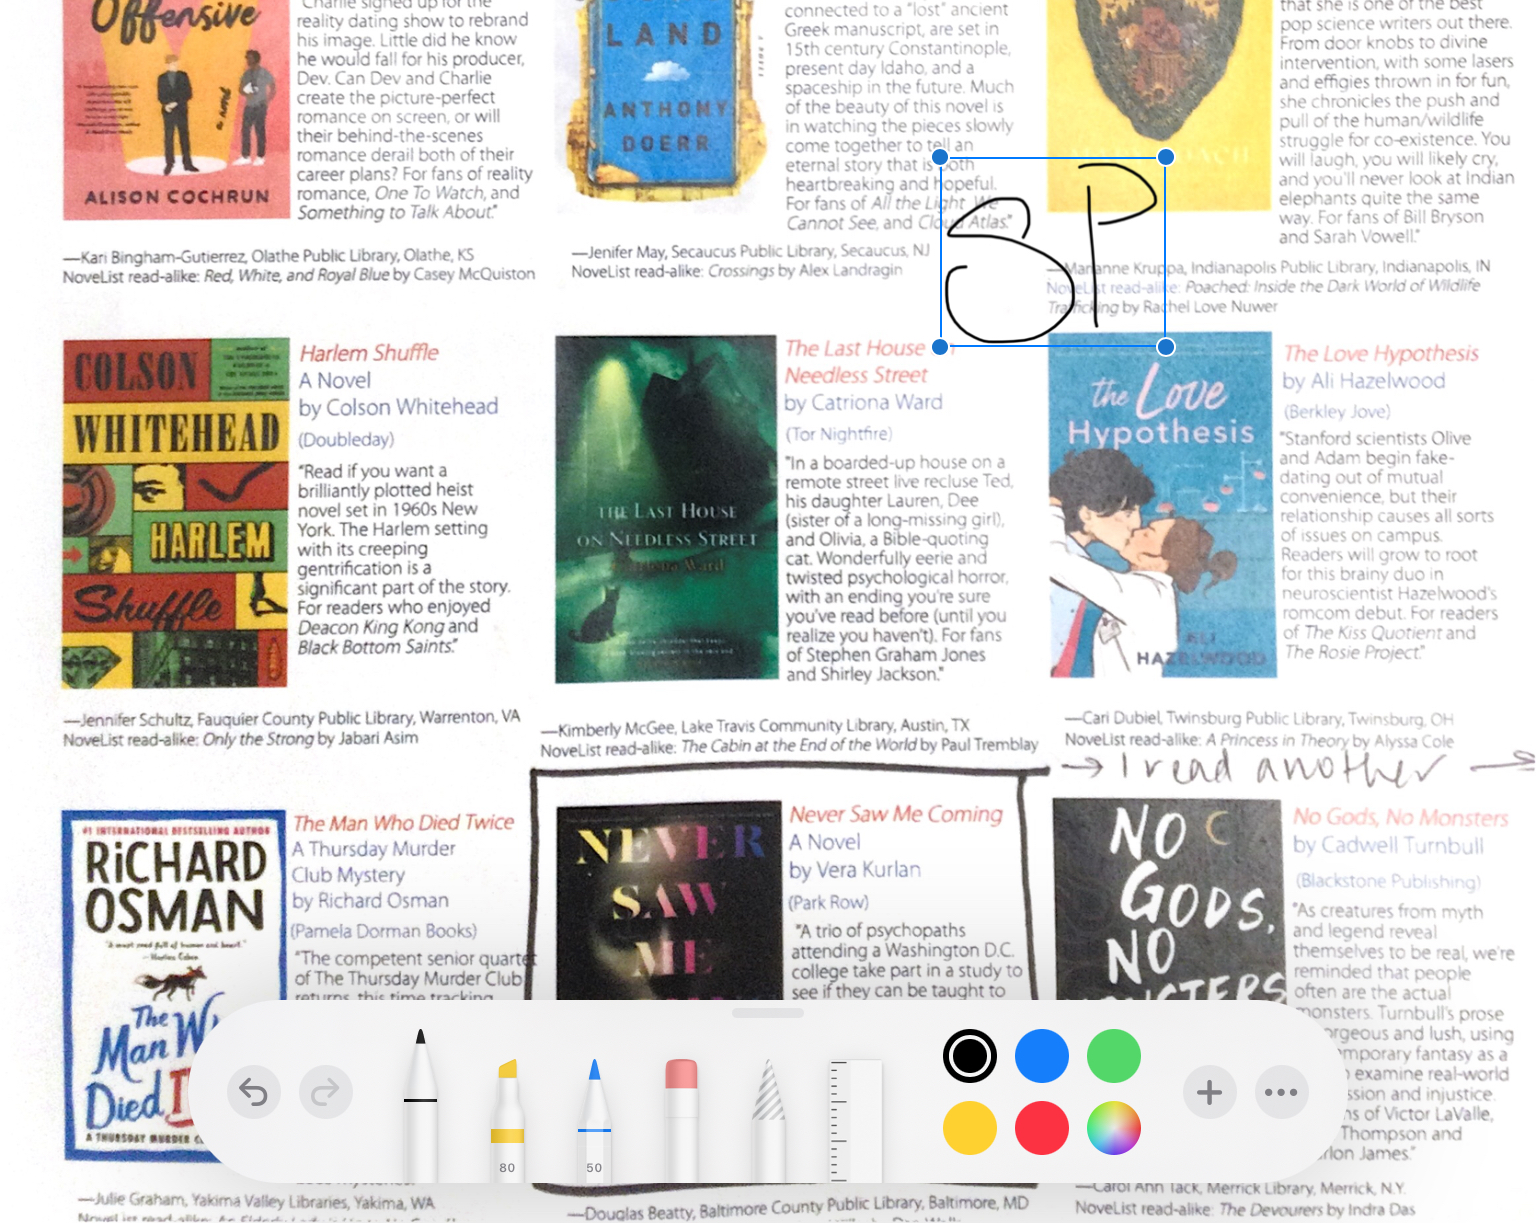
Once a document has been scanned, you can also add an electronic signature, either typed with text or signed with your finger or stylus on the screen. As mentioned in the previous step, tap on the picture of the document to open it, and then tap the share icon. From the share menu, tap on Markup. A toolbar will pop up near the bottom of the screen. To add a signature, tap on the plus icon, and then tap on Signature.
Once you tap on signature, a box will pop up where you can sign your name with your finger or a stylus. You also have the option to add a text field, which may come in handy if the document has a field that requires a printed name.
Once you’ve signed your name, tap on done. If you make a mistake and need to start over, tap on clear. After you’ve tapped done, you can resize the signature by tapping on the blue circles in the corners of the signature box and dragging them to your desired size. You can move the box to your desired location in the document. If you want to delete the signature field, simply tap on your signature and then choose delete. Once you have created a signature, your device will save it for easy access in the future. If you would like to delete saved signatures, tap the plus sign, then signature, and then add or remove the signature. You’ll see a list of saved signatures and you can tap the red symbol next to the saved signature to delete it. You can also add another signature by tapping the plus symbol on the top left.
Once you have added your changes, you can share the document using the method discussed earlier. If you would like to remove signatures after exiting the app, open the scanned document in your note and choose markup. You can remove any previous additions by tapping on them and choosing delete. In addition to text fields and signatures, you can also add a description. Image descriptions can be read by screen readers and are useful for anyone who has difficulty seeing images online. You can also use the magnifier to enlarge portions of the document. Another markup option is adding shapes that include a square, a circle, a dialog symbol, and an arrow. You also have the standard markup tools available as well: the marker, highlighter, colored pencil, eraser, lasso tool, and ruler.
Conclusion
Scanning and signing an electronic document can be done will your iPhone or iPad. You can create multipage PDF files, add electronic signatures, and easily share your documents via email, text, or other methods by using a built-in feature of the Notes app. Have you tried scanning documents with your iPhone or iPad? Let us know in the comments.