Meet the Best Free Browser Tool for Removing Backgrounds

Have you ever wished you could take that great photo of yourself and change the surroundings? Removing people or unsightly background items from your favorite pictures could be very useful, for example. Many folks think you need an expensive tool like Photoshop to make this happen. The good news is, there are several free/low-cost tools that can be used for this purpose. You may even already have access to some of them without knowing it! Today we are going to focus on a tool that can be used in any modern browser without creating an account or downloading software: remove.bg.

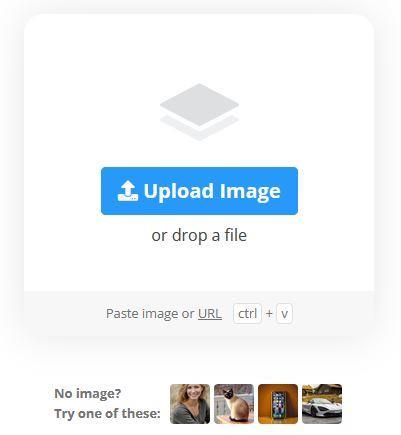
The interface couldn’t be simpler. To upload your image, you can drag and drop an image, search your computer files for an image, or copy/paste an image or image URL.

When your image is uploaded, the program gets to work removing what it thinks is the background. This car image was spot on.

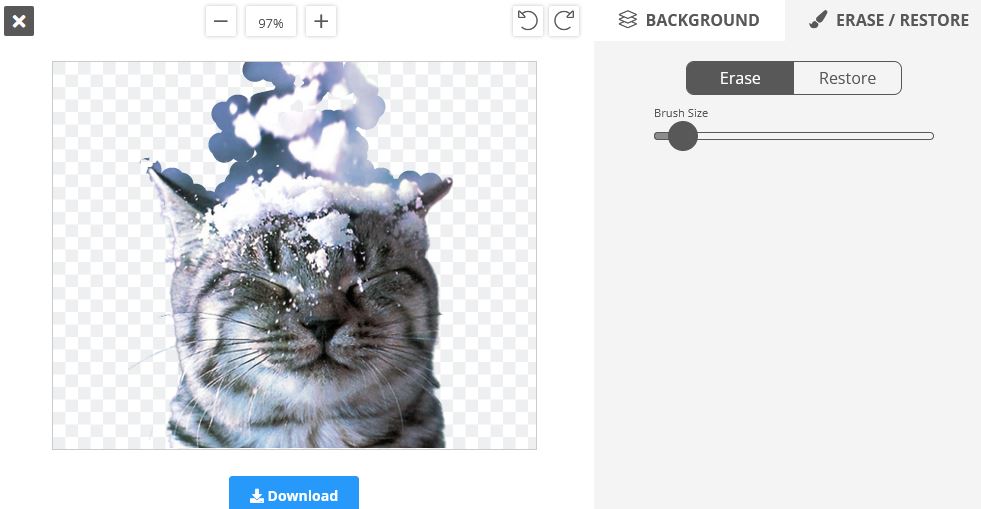
When I used a more complicated image, the remove.bg took off the falling snow that I wanted to keep above the cat’s head.

Notice the edit button in the top right of the image with the background removed. Clicking that leads to options for setting a new background or editing how much background is removed.

Add another background or download the image without one

Click the erase/restore tab in the upper-right to get a resizable “brush” to remove more background or restore something that the tool took out. In this case, I restored some snow with a wide brush here. I can go back and erase with a smaller brush to cut a finer line around the snow.

Fine-tuning what to keep from the original

I went back to the background tab and chose a dramatically different color for the new background, but I could have downloaded the image without adding another background if I wanted to use it in another image editor. Or I can download this version with the new background:

Cutting around the snow was tough!

The Fine Print

Anytime a tool is free, we should be skeptical about what we are agreeing to in exchange for the service. If you are concerned about your privacy, you can check out their privacy policy, but I didn’t see anything there that I was concerned about. In this case, remove.bg is free for low resolution (up to .25 megapixels or around 625px x 400px) images. If you want your downloads to be at a higher resolution, you will need credits. One (credit) per month is allowed on the free plan. Credits can be used in the downloadable version of remove.bg.

If you need to work with larger images more often you can go with a paid plan. Plans are available as subscriptions (credits per month) or pay as you go (credits to be used within two years of purchase). More about credits on their website.

Conclusion

Remove.bg is a great free browser tool for removing image backgrounds. Have you used remove.bg? If so, let us know in the comments. Stay tuned to this blog for more tools to remove image backgrounds and other Tech Tips.

Introducing Canva: Everything You Need in an Image Editor for Free

What is Canva?

Canva is an easy-to-use freemium image editor that can be accessed in any modern browser, without downloading software. One of the best parts about Canva is how many features are available on the free plan, including working with a team. Pro plans offer branding, access to additional templates and stock media, more cloud storage, and a few advanced editing options. The Pro plan is currently $120 per year, which may be worth it if you want a robust feature set to generate images for a small business or club. Take a look at the Canva pricing page to find out more about the features available at different subscription levels. Hot tip: Canva offers free Pro subscriptions for educational and nonprofit institutions.

Why would I need Canva?

Whether you post regularly to social media or just want to create a pretty newsletter for your family once a year, almost everyone can find a reason to use Canva. The intuitive interface makes it easy to create memes, promotional graphics, infographics, presentation slides, invitations, flyers, signs, brochures, videos – you name it! There are plenty of ready-to-use templates, but you can also start creating something from scratch. If you already have an image you want to incorporate into a larger design, you can do that, too!

Canva is especially helpful if you’re not a graphic designer. The built-in templates are perfectly sized for any medium and can be used as-is or provide inspiration for your own design. Drag-and-drop images, fonts, borders, backgrounds, and other elements to create your perfect design. Then download the image in the format of your choice.

Where can I learn more?

Tech-Talk, a resource provided by the East Greenbush Community Library to its members, has created several resources for learning the ins and outs of Canva. Here are a few examples:

Have you used Canva?

If you’ve tried Canva, let us know what you think about it! Do you have an image tool that you love? We’d love to hear about it! Let us know in the comments.

Introducing Biteable: The Best Free Image Resizer

If you post to a blog or social media, it is likely you need the same image in several different sizes to maintain a consistent branding experience across platforms. Manually resizing an image can be a frustrating and time-consuming experience, especially when social media networks keep changing their optimum sizing requirements.

If you are a Canva user, you may have already seen automatic resizing in action. When it was first introduced, Canva’s tool was a breakthrough. Our library relied on it for messaging across platforms. Canva requires an account and login, though. If you are looking for a free tool you can use without creating an account, Biteable’s tool may be for you. It also contains a feature that goes one step beyond Canva’s resizer.

What Is Biteable?

Biteable is a freemium suite of tools for creating and editing videos. The free tier includes puts a Biteable watermark on your videos (but not in the image resizer) and limits the resolution of your video. It does include access to stock clips and images, as well as allowing unlimited exports. For more information about features in the paid plans, visit Biteable’s pricing page.

You will need an account to create and edit videos, even at the free level. But their offer their image resizing tool with no account needed and no strings attached.

The Image Resizer

Upload Your Image

To access the tool, open a browser and point it to: https://biteable.com/tools/image-resizer. Look for the “custom resize” box and upload your starter image:

Screen shot of the image upload window in the custom resize area.
Start by uploading your image here

Don’t worry about setting the width and height here unless you have a specific size in mind. The magic starts when we scroll down a bit to set our focal point. This is the extra feature that sets it apart from Canva’s tool, in my opinion.

Set the Focus Point

Drag the white circle around the most important part of your image. Canva assumes the most important part is centered, but that is not always the case. In this image, the most important thing is a bit off to the right:

Screen shot showing the original image with a white circle over the intended focal point of the image.

Scan the Results

After setting the focus point, scroll down. First you will see all 10 different sizes Facebook requires for their image areas:

Screen shot of the original image converted to all 10 standard sizes Facebook requires for stories, page covers, event covers, ads, etc.

Keep scrolling and you will see standard sizes for:

  • Instagram (6)
  • Twitter (6)
  • YouTube (4)
  • Pinterest (5)
  • LinkedIn (9)
  • Google Display (8)
  • Email/Blog (3)

Handily, the focal point selector sticks with you as you scroll down the page, so you can adjust on the fly, if needed.

Download Some or All Images

In the focus point selector, there is a button that allows you to download all of the images for all platforms at once. These will arrive as a compressed file on your computer.

Images can also be downloaded individually by clicking on the download icon in upper right of each image:

Screen shot showing the download icon in the upper-right of the resized image.
Download icon in the upper-right

Conclusion

Have you used Biteable’s image resizer? Do you have an image resizing tool you love? Let us know in the comments.